This post may contain affiliate links. Please see our disclosure policy.
This is officially part 1 of “bring on spring”, a new series I’ll be doing to highlight some spring vegetables you’re about to see at the markets.
My goal with this series is to introduce to you seasonal vegetables I love to cook with, what they’re similar to so you have a comparison point, and the best part, a fun new recipe you can try.
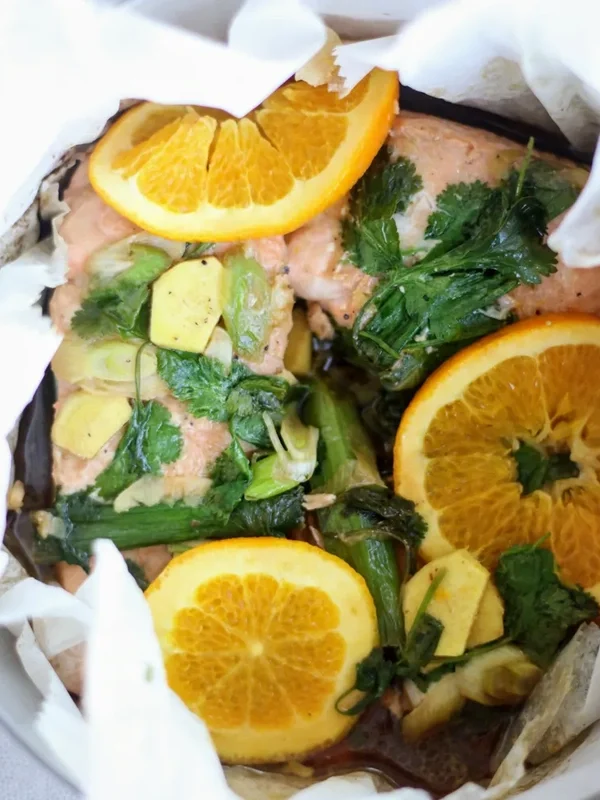
So today, to kick off this new series, we’re going to talk about green garlic, and how to use it in this Spring Vegetable Fresh Pasta. You can pair this pasta with a lemon garlic chicken, or for my vegetarian friends, this recipe is just as good with burrata instead of chicken.
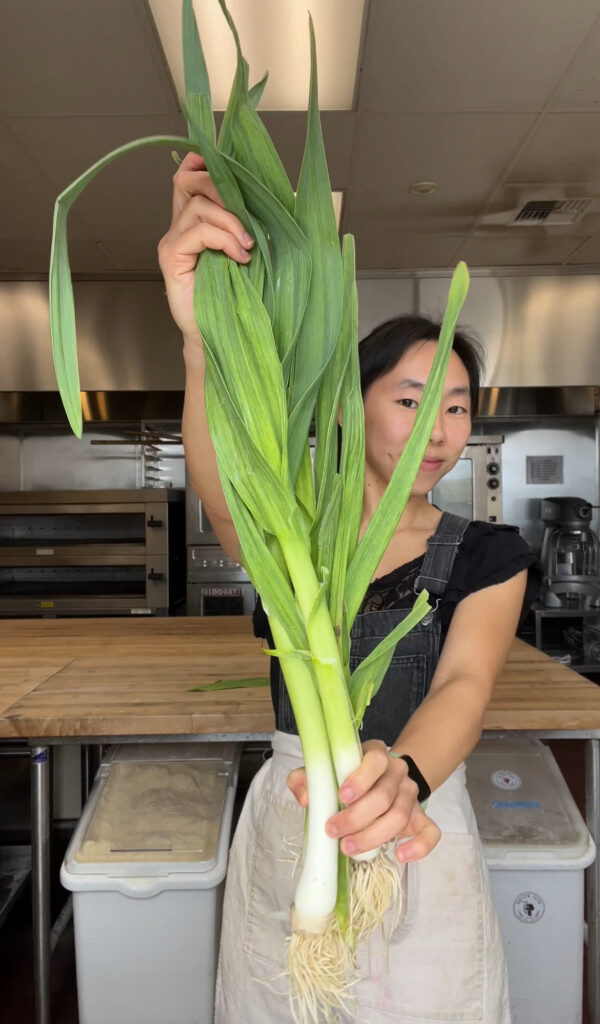
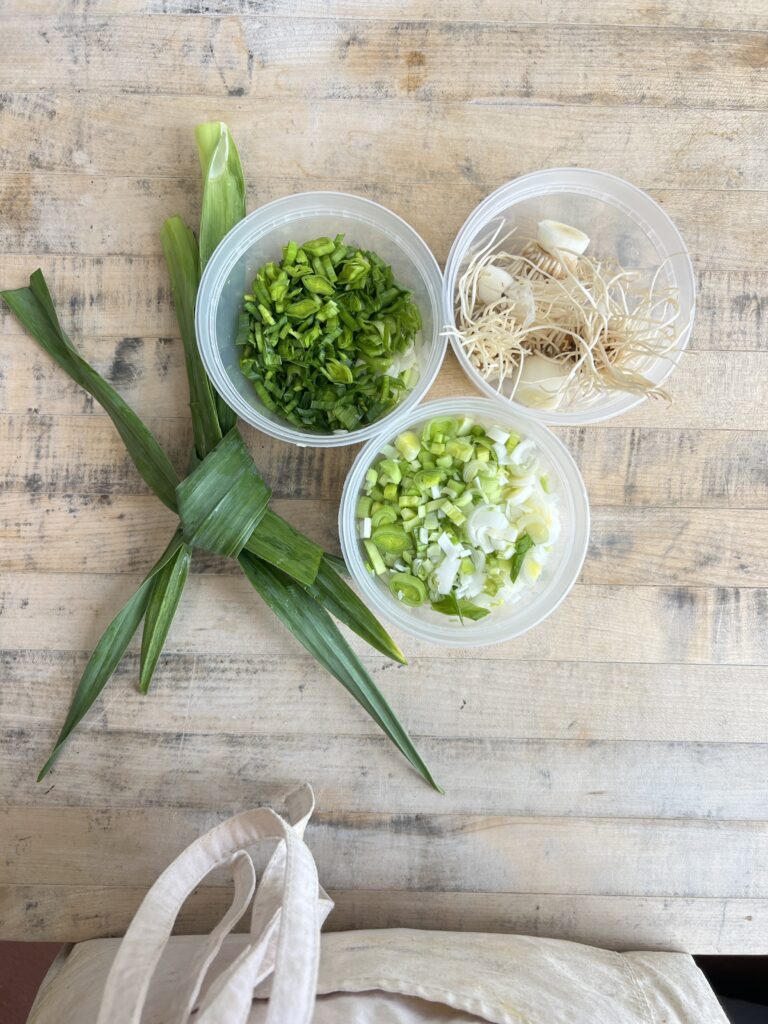
Table of Contents
- What is green garlic?
- How should I use green garlic?
- How to prepare green garlic?
- Some other FAQ about green garlic:
- How to make the Spring Vegetable Fresh Pasta with Lemon Garlic Chicken – Step by Step:
- Recipe:
- If you liked this Spring Vegetable Fresh Pasta with Lemon Garlic Chicken:
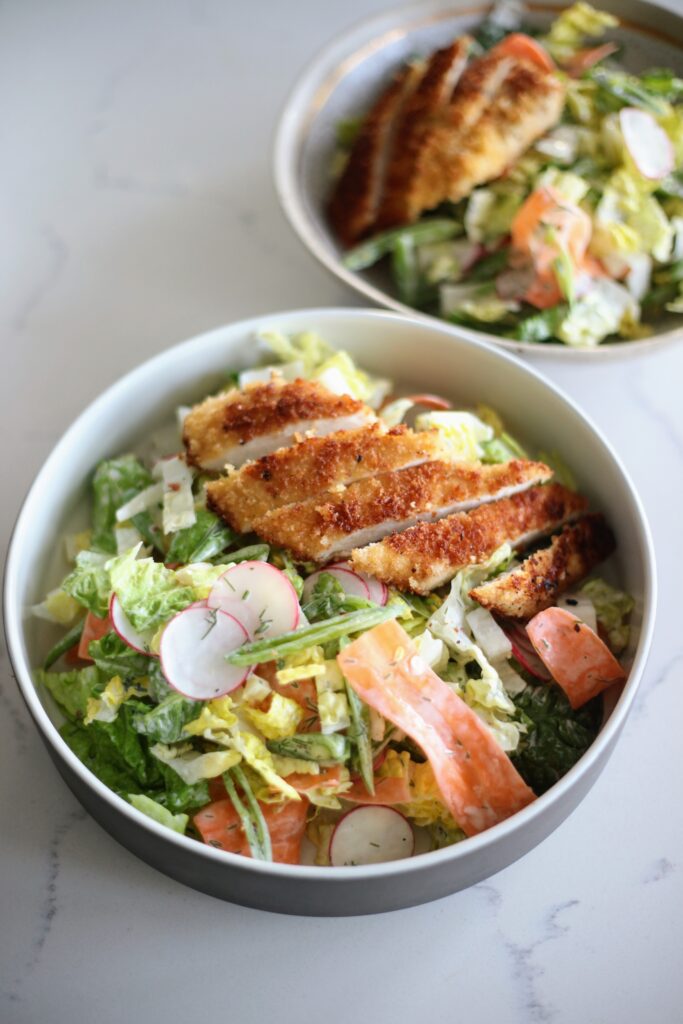
- Crispy Chicken Salad with Spring Veg
- Spring Veggie Flatbread with Burrata
- Spring Vegetable Fresh Pasta with Lemon Garlic Chicken Recipe
Table of Contents
- What is green garlic?
- How to use it
- How to prep it
- How to store it
- How to make this Spring Veg Pasta – Step by Step
- A few key tips to bring this pasta up a notch
- Storage and Reheating
- Substitutions and Modifications
- Video Tutorial
- The Recipe
- Looking for more similar recipes?
What is green garlic?
Green garlic is just young garlic, or BABY garlic. It’s the garlic plant before it grows into the big bulb that you’re familiar with, and instead of using the cloves of the bulb, we use the entire stalk.
It looks like a massive green onion or scallion, and tastes a bit more subtle than garlic itself.
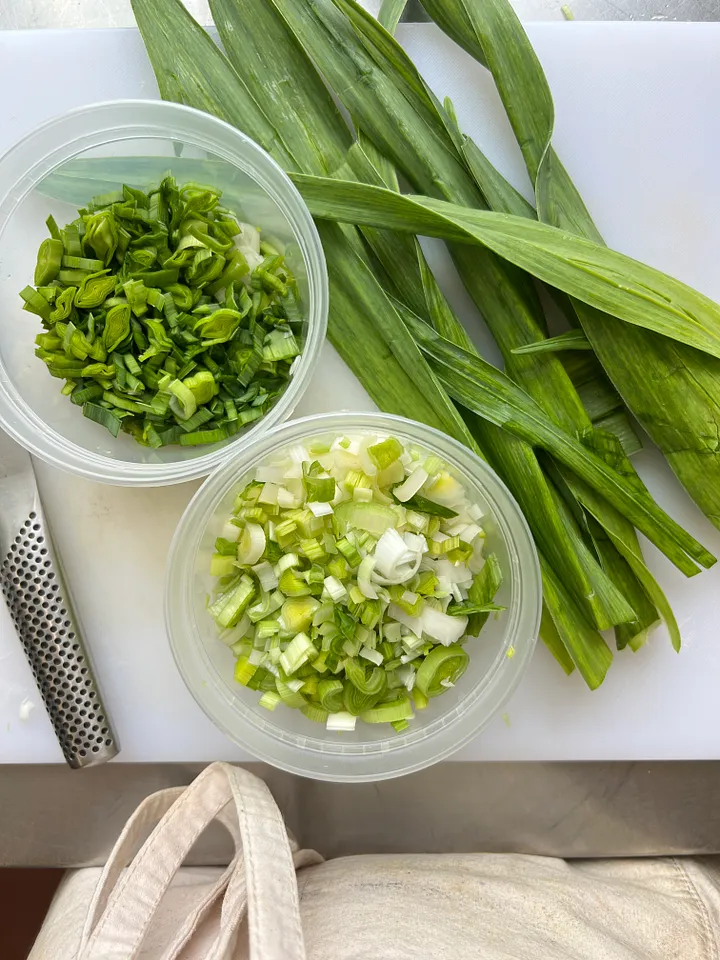
There are 4 different parts of the green garlic you can use:
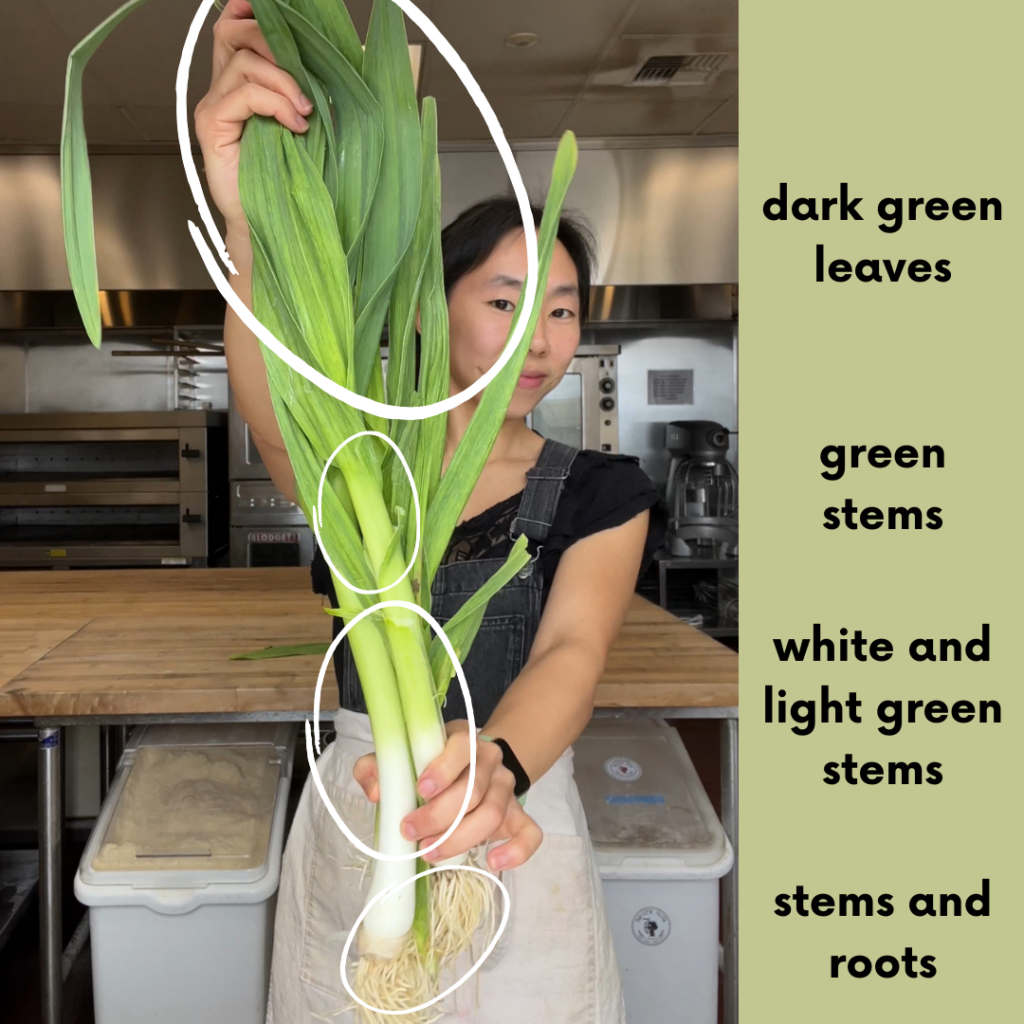
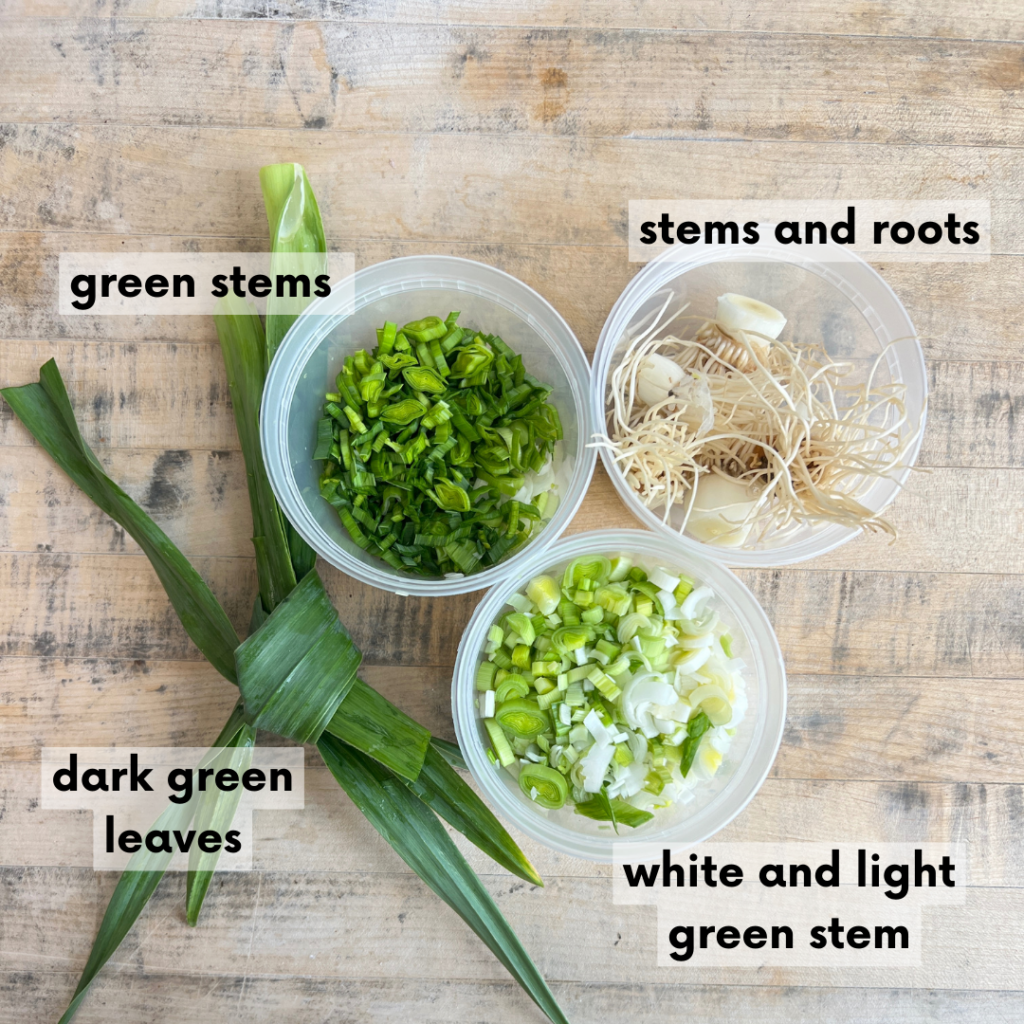
- Dark green leaves – these can tend to be a bit tough. Rather than including them into your cooked dish and having someone chew lots of fiber, I prefer to add this to stock. You can tie them in a cute little knot, tie them with some bouquet Garni (with some additional parsley, thyme, etc), and add them into your stock along with your onions, carrots, and other veg.
- Stems & roots – the stems and roots can be thrown out, but you can also add this part into your stock or soup (after washing thoroughly of course)! It’s more mild than an onion, but I love the light flavor it adds to a soup. After cooking it for as little as 30 minutes or up to 3 hours, you can compost this.
- White & light green stems – the main component of the green garlic. THIS IS THE BEST PART of the green garlic. We will use these parts to sauté in butter as the base of our pasta sauce.
- Green stems – there’s a section of the green garlic that looks like a leek (photo in the middle below). This part can also be used to cook with, and I usually add this a few moments after adding the white and light green parts.
How should I use green garlic?
In simplicity, you can use green garlic just like how you use a green onion or scallion. However, the flavor is more subtle and has more of a garlic fragrance.
I’m personally not a fan of either raw garlic or onions, so I prefer to mostly cook with it. I add the white and light green stems to some fat (oil or butter) and saute for a couple minutes before tossing with the other ingredients. These other ingredients can be vegetables, eggs, toast, pasta, salmon, you name it. It pairs especially well with fresh herbs, dairy (cream and butter), and vegetables.
Because green garlic is milder than dry garlic, the flavor can also be nice in raw form, like in an aioli or vinaigrette. I don’t like raw garlic, but I do love aioli (which is made with raw garlic paste).
I’ll be making a green garlic aioli with salmon burgers for our supper club menu next week, and can share a recipe for this then.
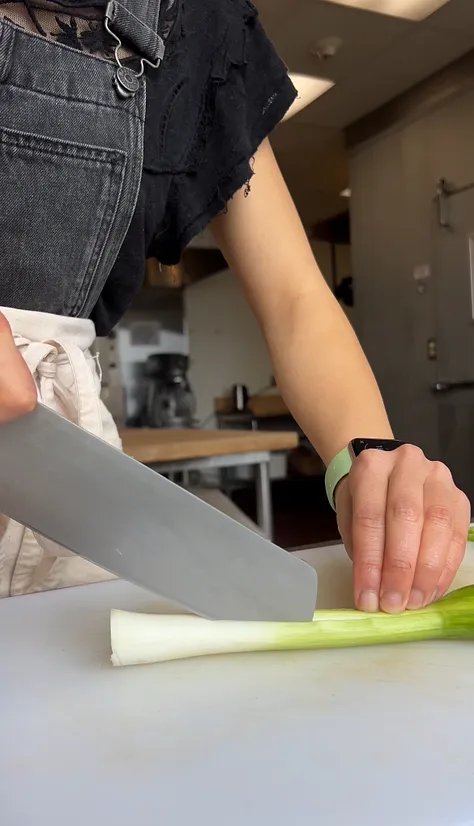
How to prepare green garlic?
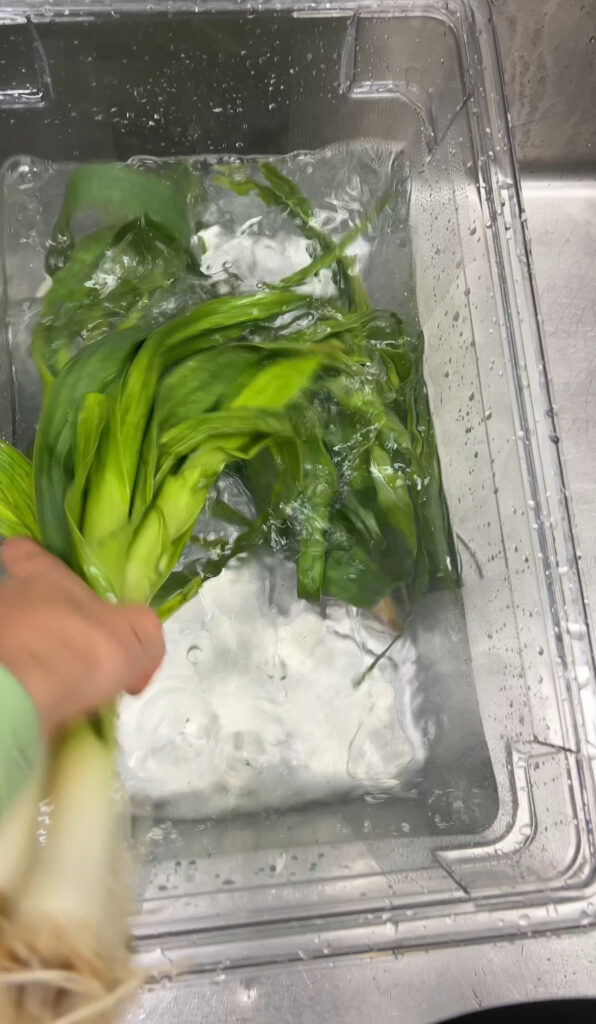
Step 1: Wash the entire stalk thoroughly. This is a vegetable that is grown in dirt, so it’s likely there is dirt somewhere in the green garlic. Peel back some of the darker green leaves to look for dirt pockets and soak this in water.
Step 2: Slice off the roots and dark green leaves. You can use this for stock.
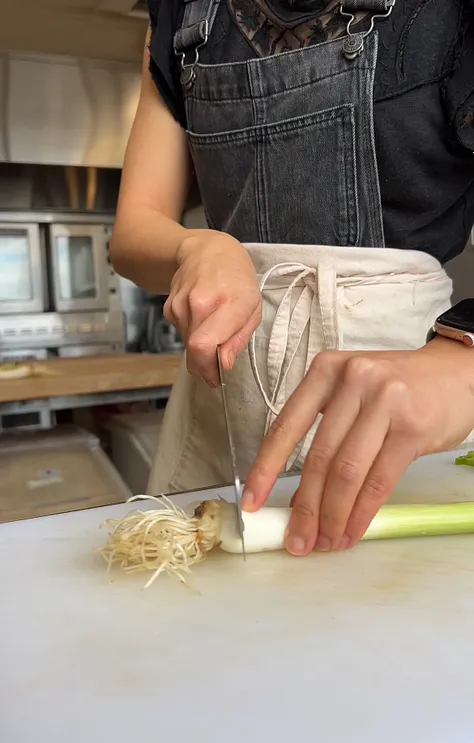
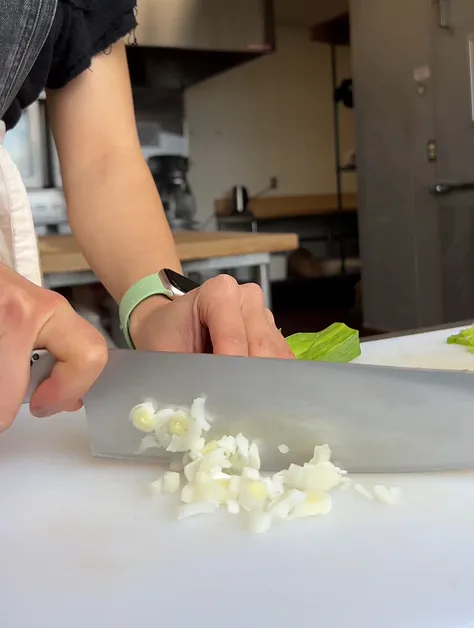
Step 3: Depending on the size of your stem, make 3 long slices lengthwise through the light green and white parts of the green garlic.
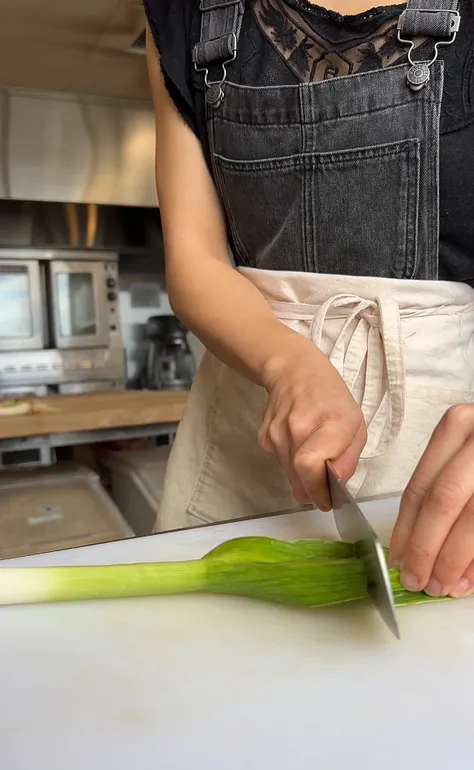
Step 4: Turn the stalk 90 degrees, then slice perpendicular to the lengthwise cuts. Once you get to the darker green stalk, you can just slice this into 1/8” thick pieces.
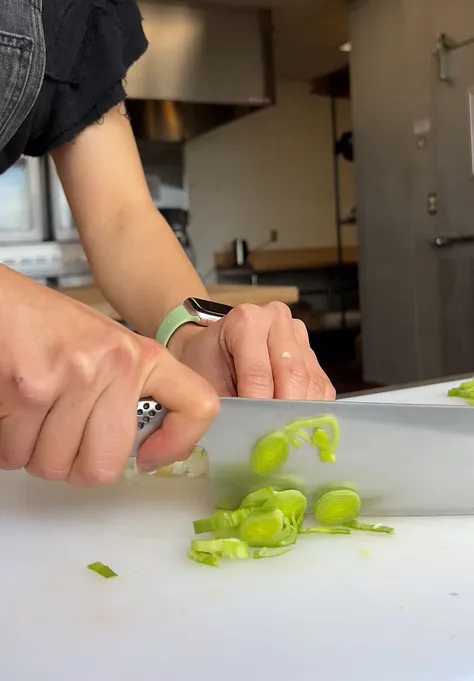
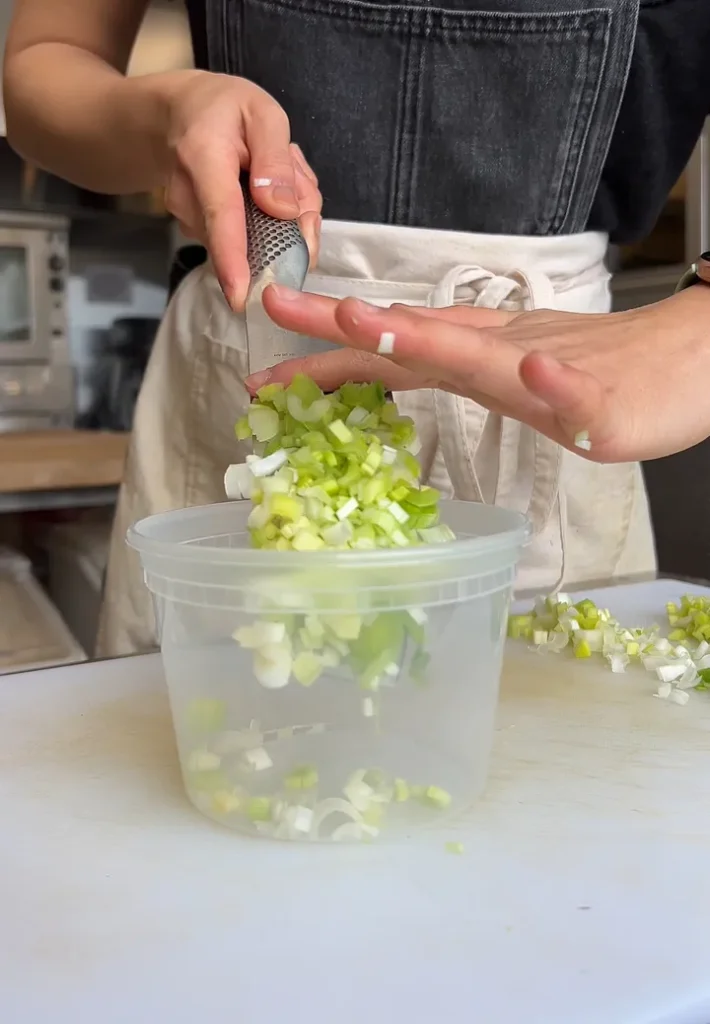
Step 5: Set aside in individual containers the white and green stems, darker green stems, stems and roots, and dark green leaves.
Some other FAQ about green garlic:
- How to store the green garlic?
- Store uncut green garlic in your refrigerator for up to 2 weeks.
- You can place this in a plastic bag and into the vegetable drawer to keep this as fresh as possible.
- If you’ve already sliced the green garlic like shown above, try to use this within 3-4 days.
- What else can I make with green garlic?
- add green garlic to a homemade pesto
- add green garlic on a flatbread (my spring vegetable flatbread would be so fire with the green garlic and olive oil base).
- tossed with roasted vegetables
- Can I eat green garlic raw?
- Yes, but it will taste like a raw allium (onion family)
How to make the Spring Vegetable Fresh Pasta with Lemon Garlic Chicken – Step by Step:
This is just a high level overview with photos. Refer to the full recipe below for exact instructions and measurements.
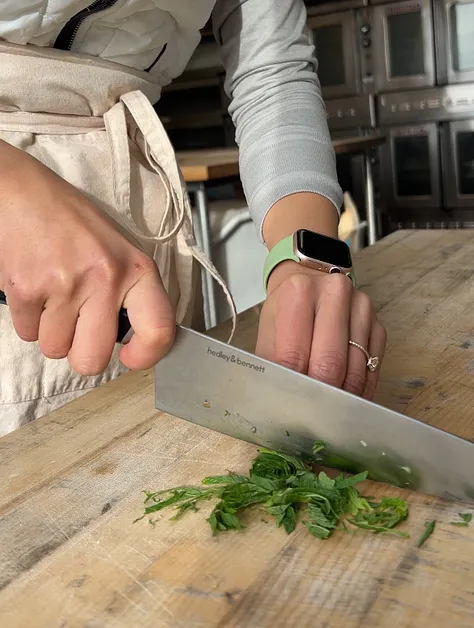
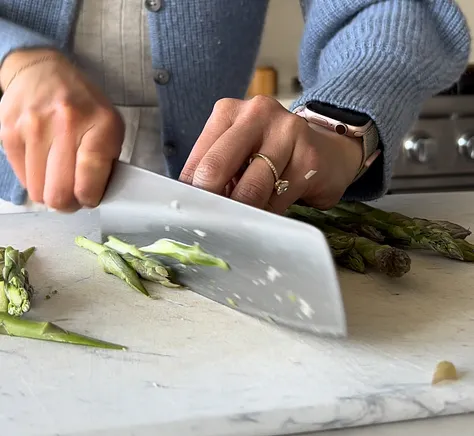
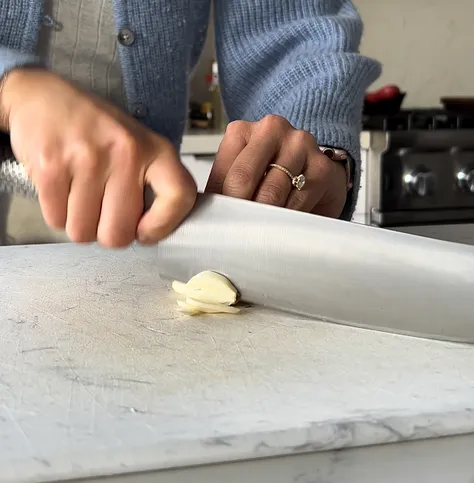
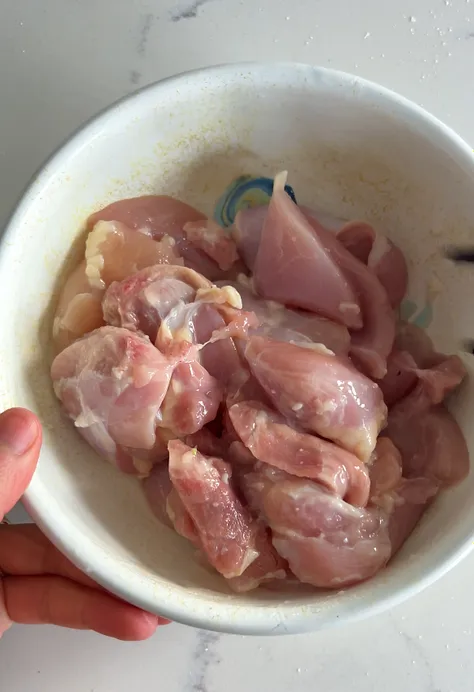
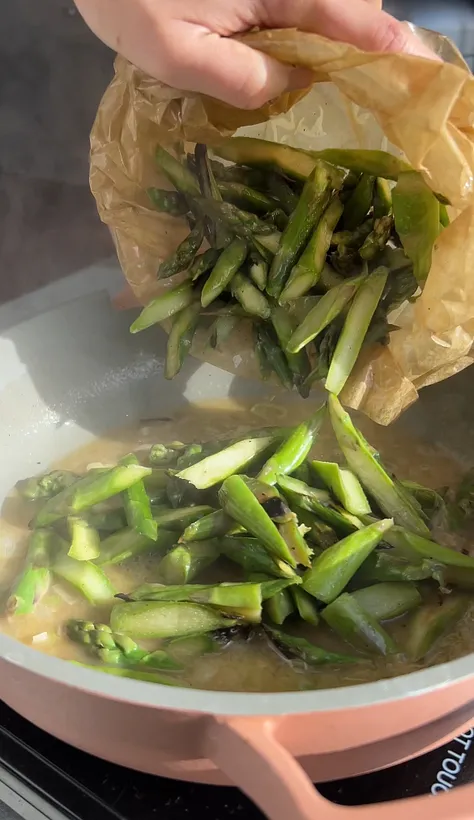
Step 1: Prep all the vegetables – slice the mint, green garlic, garlic for the chicken marinade, and the asparagus.
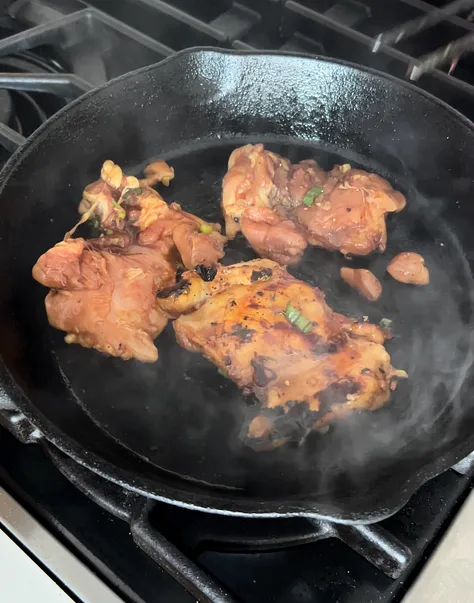
Step 2: Marinate and cook the chicken.
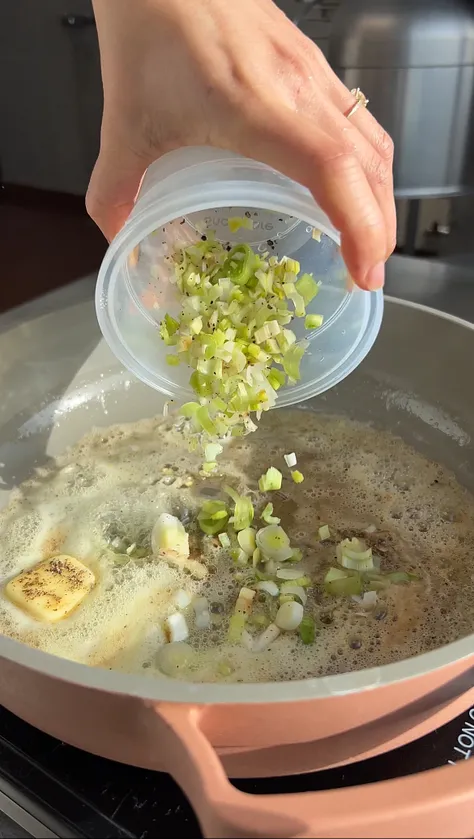
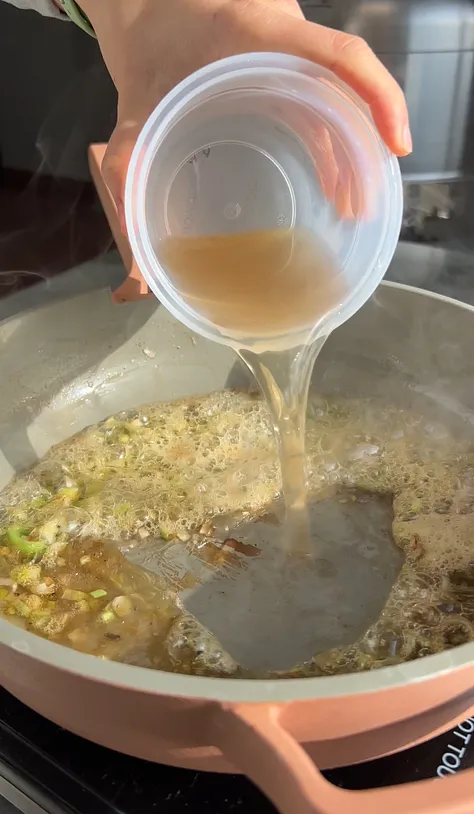
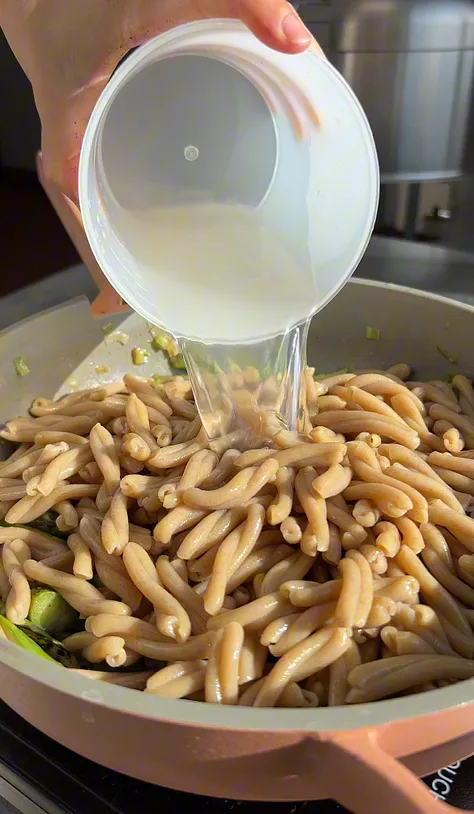
Step 3: Make the pasta sauce.
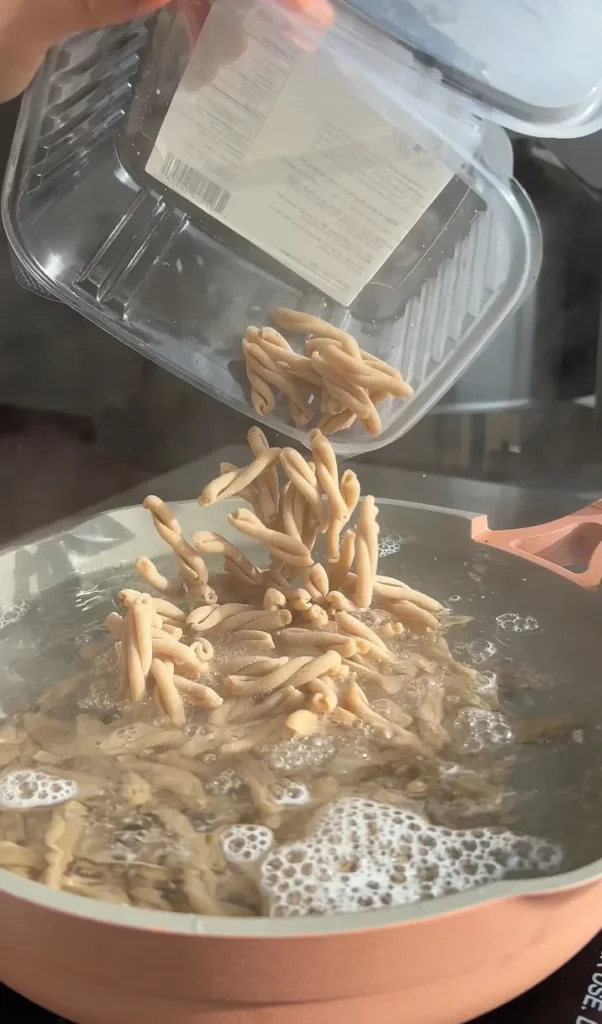
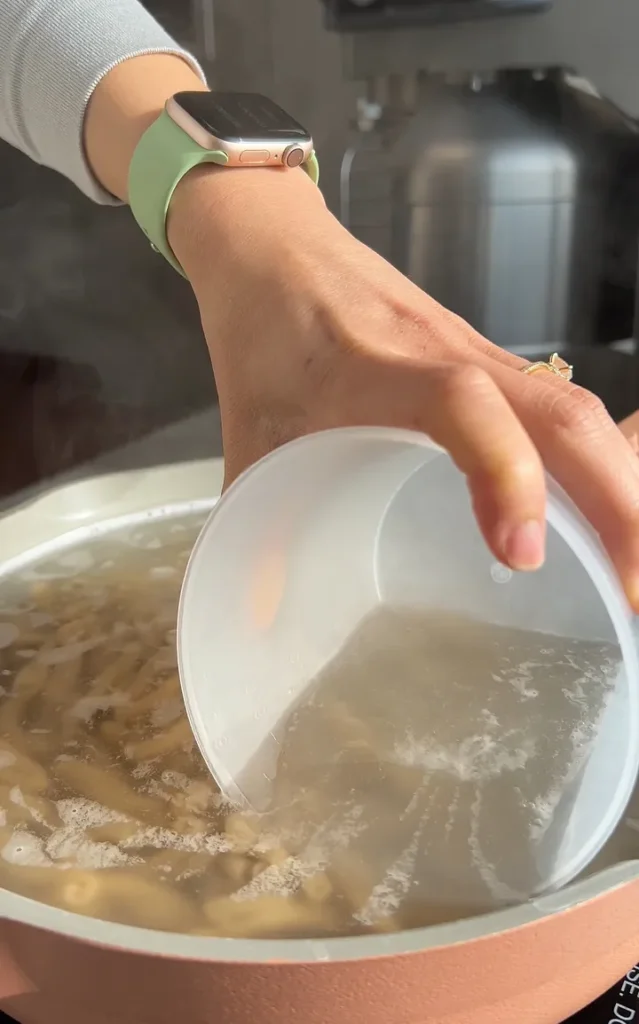
Step 4: Cook the pasta and reserve pasta water.
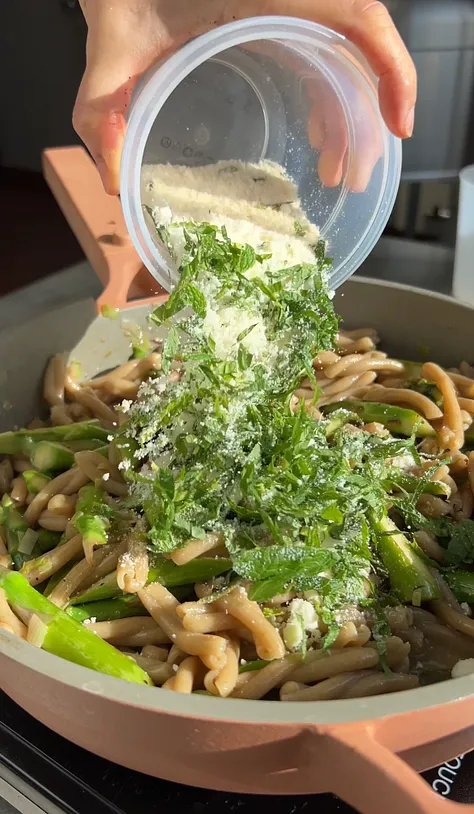
Step 5: Combine the pasta, pasta sauce, parm, and mint.
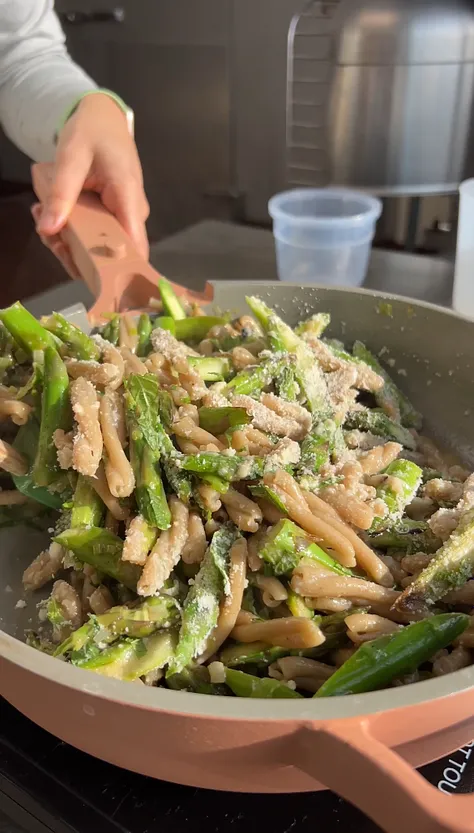
Step 6: Plate, and serve with the chicken or burrata
A few key tips to bring this pasta up a notch
- Char your asparagus before adding to the pasta sauce. High heat is the secret ingredient to cooking flavorful vegetables, and if you want to uplevel your asparagus texture and flavor, char your cut asparagus with 1 tablespoon of neutral oil in your cast iron before adding it to your pasta sauce. Instead of adding this before your broth, add the charred asparagus after your broth has simmered a bit to prevent it from overcooking.
- Make sure to cook your pasta al dente. Your pasta will finish cooking in the sauce, so it should have a bit of a bite when you add it to the sauce.
- DO NOT SKIP THE MINT. Mint might sound a bit weird if you don’t use this herb frequently, but I swear the mint is what takes this pasta from a 8 to a 10 – it adds a freshness that can’t be beat!
- Use a good quality chicken broth – this adds SO much flavor to the dish. Pasta water is needed as well to help emulsify the sauce, but the simmered down chicken broth (or vegetable broth) is truly what makes this so flavorful.
Storage and Reheating
Storage: Store the cooked pasta in an airtight container for up to 4 days in the fridge. You can keep all the ingredients in the same tupperware.
Reheating: Reheat in a pan on medium high heat until warm. Add a couple tablespoons of water to help loosen the pasta sauce and cook more evenly.
Substitutions or modifications
For the fresh pasta:
- 4 tablespoons of European butter – can use regular butter, vegan butter, or olive oil
- 1/2 – 3/4 cup of chicken broth – sub vegetable broth or water
- 12 ounces fresh short pasta – can use boxed pasta if you can’t get fresh pasta
- 1 bunch asparagus cut into 2″ pieces on a bias – can sub sugar snap peas, broccolini, any green and slender vegetable that cooks quickly
- 1/3 cup fresh mint; tightly packed leaves, chopped – highly recommend using mint, but you could skip or sub parsley, cilantro, basil, or tarragon.
- 1/3 cup pasta water – highly recommend using pasta water, but can sub broth or water
- 1/2 cup of grated parmesan cheese – can skip or sub grated pecorino cheese
- 1.5 lbs chicken thighs – use 8 ounces of burrata instead
VIDEO TUTORIAL:
Recipe:
Print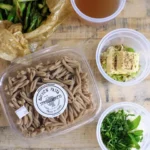
Spring Vegetable Fresh Pasta with Lemon Garlic Chicken
- Total Time: 40 minutes
- Yield: 4 servings 1x
Description
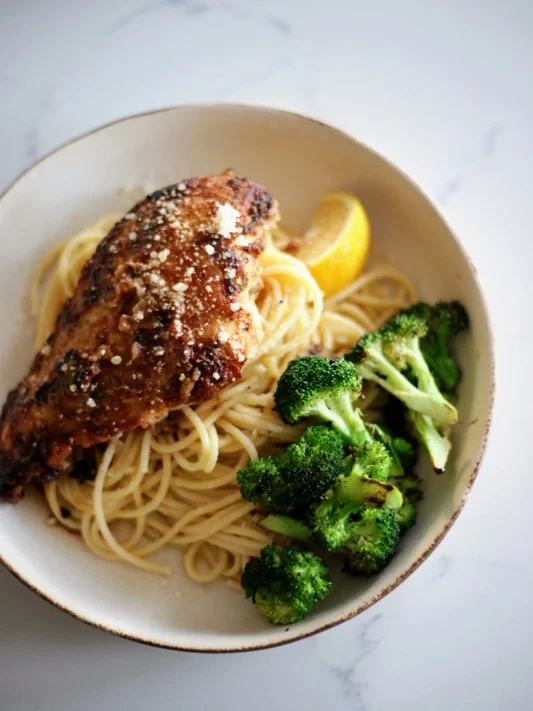
This green garlic pasta highlights a spring vegetable that is tender, vibrant, and so delicious. It comes together in 30 minutes, and will for sure be a family favorite!
You can pair this pasta with a lemon garlic chicken, or for my vegetarian friends, this recipe is just as good with burrata instead of chicken.
Ingredients
For the Spring Vegetable Fresh Pasta:
- 1 stalk, or about 1/2 cup of green garlic
- 4 tablespoons of European butter (I love the Straus brand – the nice butter is worth the splurge here)
- 1/2 – 3/4 cup of chicken broth
- 12 ounces fresh short pasta – I used strozzapreti
- 1 bunch asparagus cut into 2″ pieces on a bias
- 1/3 cup fresh mint; tightly packed leaves, chopped
- 1/3 cup pasta water
- 1/2 cup of grated parmesan cheese
- kosher salt
- black pepper
- maldon salt
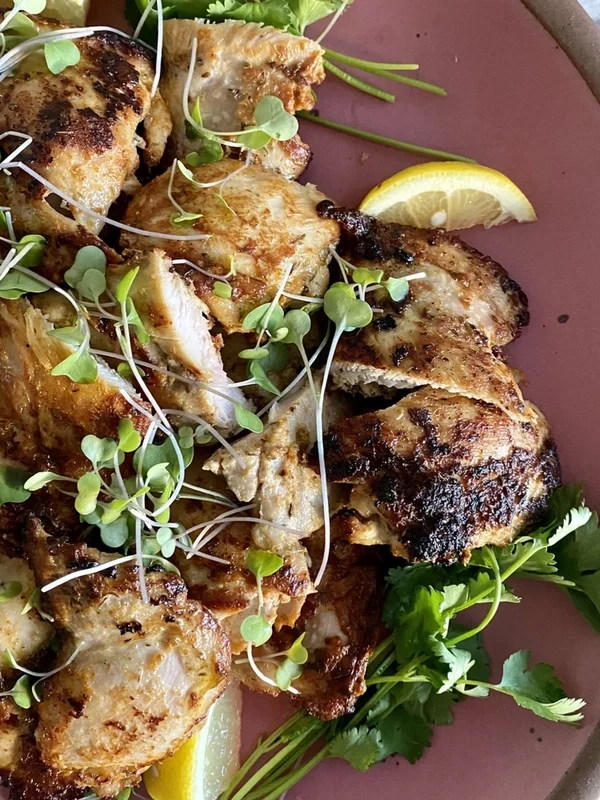
For the lemon garlic chicken:
- 1.5 lbs boneless skinless chicken thighs
- 2 cloves garlic, thinly sliced or minced
- 1.5 teaspoons kosher salt
- 6 grinds of black pepper
- 2 long peels of lemon zest, or 1/4 lemon zested using a microplane
- 1 tablespoon of neutral oil
Instructions
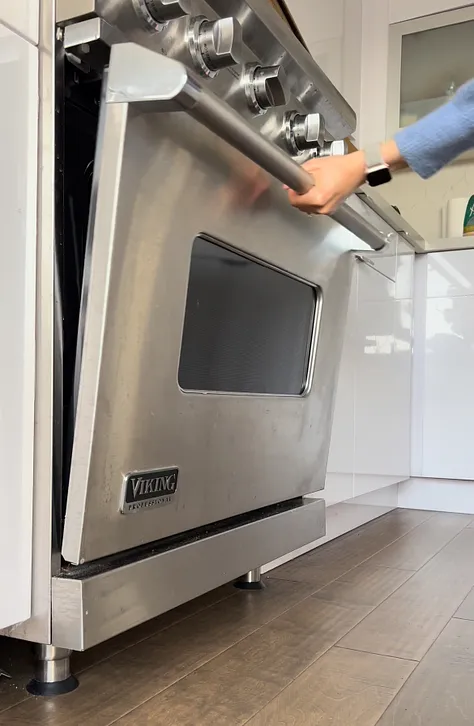
- Preheat your oven to 400F.
- Bring a large pot of water up to a boil.
- As the water is coming up to a boil, chop the mint, slice the garlic and green garlic, and bias the asparagus.
- Marinate the chicken with the salt, pepper, garlic, lemon zest, and black pepper. Mix well then set this aside.
- Heat a cast iron or oven proof pan on medium high heat. Once hot, add the chicken to the pan. Cook and sear for 4 minutes, then flip and transfer to the oven. Cook at 400F for 12 minutes, or until the internal temperature reaches 165F. If you don’t have a meat thermometer, you can cut a piece and check if it’s still pink inside.
- Heat another pan on medium high heat. Add the butter to the pan and let this melt. Add the green garlic and saute on medium heat for 2-3 minutes. Add the asparagus to the butter and green garlic mixture and cook for 1 minute. Then, add the chicken broth to the pan and let this come to a simmer. Reduce the heat to medium low as you boil the pasta.
- The pot of water should be boiling at this point. Add several large pinches of salt, then add the pasta.
- Cook the pasta for 3 minutes, and reserve 1/2 cup of pasta water near the end of cooking. Add the al dente pasta directly to the sauce pan along with 1/3 cup of pasta water. Add the grated parmesan cheese and chopped mint and give everything a mix. Add a tablespoon more of olive oil and give it a taste (you want it to be more liquidy than you think, as it will cool and the sauce will thicken). Adjust seasoning to taste with a pinch of salt, pepper, or olive oil, and remove from the heat. You should not cook the pasta for more than 3 minutes after transferring it from the boiling water.
- After the chicken is cooked, slice this into 1/2″ thick pieces. Plate the pasta in a bowl, making sure to add some pieces of asparagus on top. Place the sliced chicken slightly off center, then garnish with mint. Give the pasta another drizzle of olive oil (optional, but recommended), and enjoy immediately!
Equipment
Notes
- Instead of lemon garlic chicken, you can use burrata. It’s incredibly delicious with this pasta, and it’s important to top each piece of burrata with salt and olive oil.
- You can do this with just one pan if you prefer. Just cook the pasta first and rinse it under cold water to stop the cooking. Don’t worry, there will be enough starch from the reserved pasta water. Use that same pan to cook your sauce and mix everything together.
- For the lemon garlic chicken, you’re also welcome to cook this using your favorite method. I love the cast iron sear, then finish in the oven. You can also directly roast the marinated chicken thighs in the oven for 15 minutes, and broil for 1 minute at the end to get a bit of browning.
- Prep Time: 20 minutes
- Cook Time: 20 minutes
- Method: Stovetop